คุณสมบัติ
ขั้นตอนการประดิษฐ์
ขั้นตอนที่1
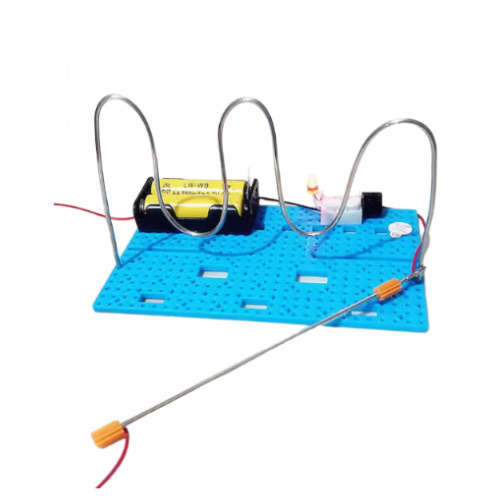
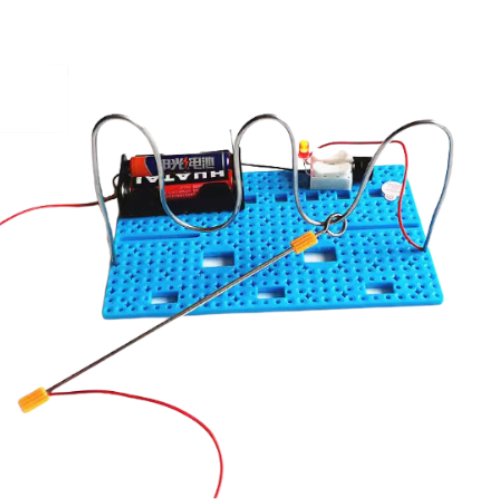
– ดัดลวดอลูมิเนียมให้เป็นตามในภาพ หรือ สามารถออกแบบการดัดด้วยตนเอง
– เชื่อมหลอดไฟ LED และ ตัวส่งเสียงเข้ากับตัวต่อสายไฟ
ขั้นตอนที่2
– ใส่เฟืองที่ปลายด้านซ้ายของเพลา แล้วขันตะปูเพื่อให้แน่
– ที่ปลายของเพลา ให้ดึงสายสีแดง ออกมาเล็กน้อย สอดเข้าไปในเพลาด้านขวา แล้วยึดไว้
ขั้นตอนที่3
-ยึดกล่องแบตเตอรี่ไว้ที่มุมซ้ายบนของบอร์ตก้วยสกรูสองตัว
ขั้นตอนที่4
– สอดตะปูผ่านลวดอลูมิเนียม และสอดลวดอลูมิเนียมเข้าที่ส่วนท้ายของกระดานด้านข้าง
– ลอกปายสายไปสีแดงและสอดเข้าไปในรูแผ่นฐานและสอดรวอดอลูมิเนียมเข้าไปเพือยึดสายสีแดง
ขั้นตอนที่5
– กดลวดของสายไฟสีดำของแบตเตอร๊๋เข้ากบขาของLEDทางด้สนซ้ายของขั่ว
– ต่อสายไฟสีแดงเข้ากับขLED จากนั้นใช้สกรูยาว ยึดตัวขั่วต่อเข้ากับแผ่นฐาน
ขั้นตอนที่6 ติดตังสวิตซ์เปิดปิด
Description
Invention steps
Step 1
– Bend the aluminum wire as shown in the picture or you can design the bending yourself.
– Connect the LED bulb and sounder to the wire connector.
Step 2
– Put the gear on the left end of the shaft. Then tighten the nails to make sure.
– at the end of the shaft Pull the red wire. came out a little Insert it into the right shaft and secure it.
Step 3
-Secure the battery box to the top left corner of the board with two screws.
Step 4
– Insert a nail through the aluminum wire. and insert the aluminum wire into the end of the side board.
– Peel off the red wire strip and insert it into the base plate hole and insert the aluminum screw to hold the red wire.
Step 5
– Push the black wire of the battery into the pin of the LED just to the left of the terminal.
– Connect the red wire to the LED. Then use a long screw. Secure the connector to the base plate.
Step 6: Install the on/off switch.


